
Smoking and grilling recipes
Scan for recipe:
bkyhd.com/recipe/brioche-burger-buns
Support us:
bkyhd.com/patreon
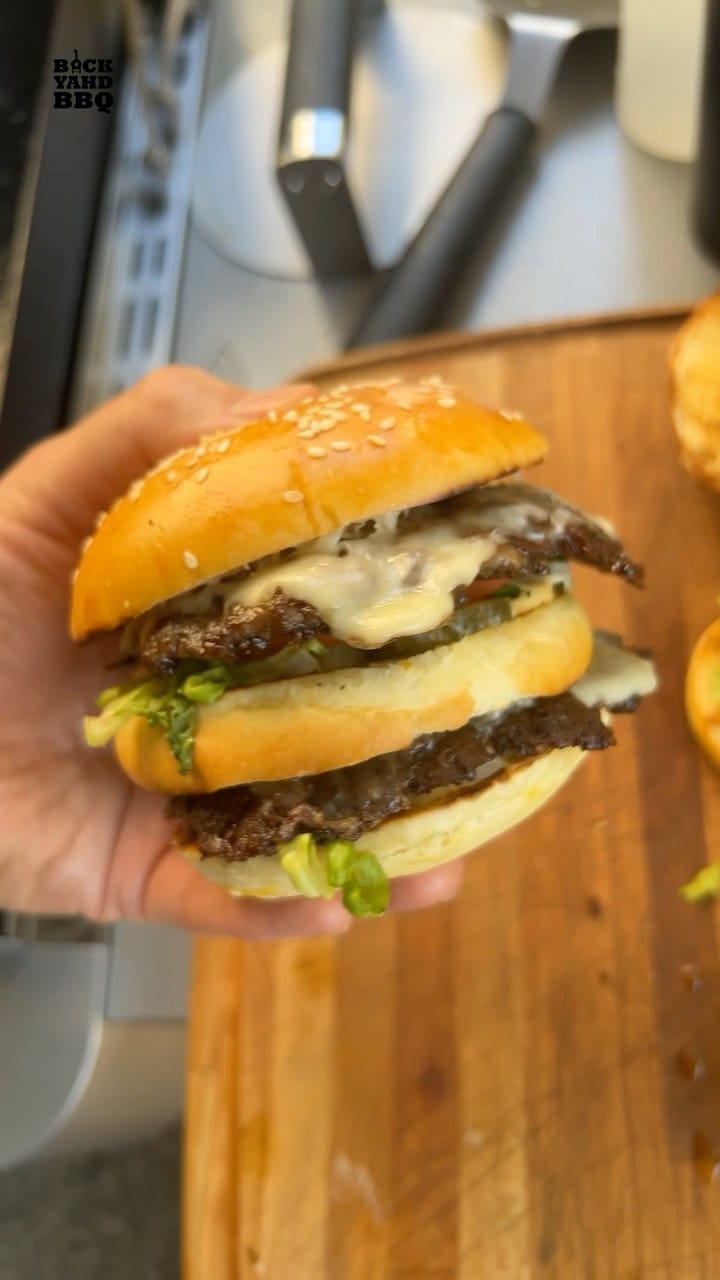
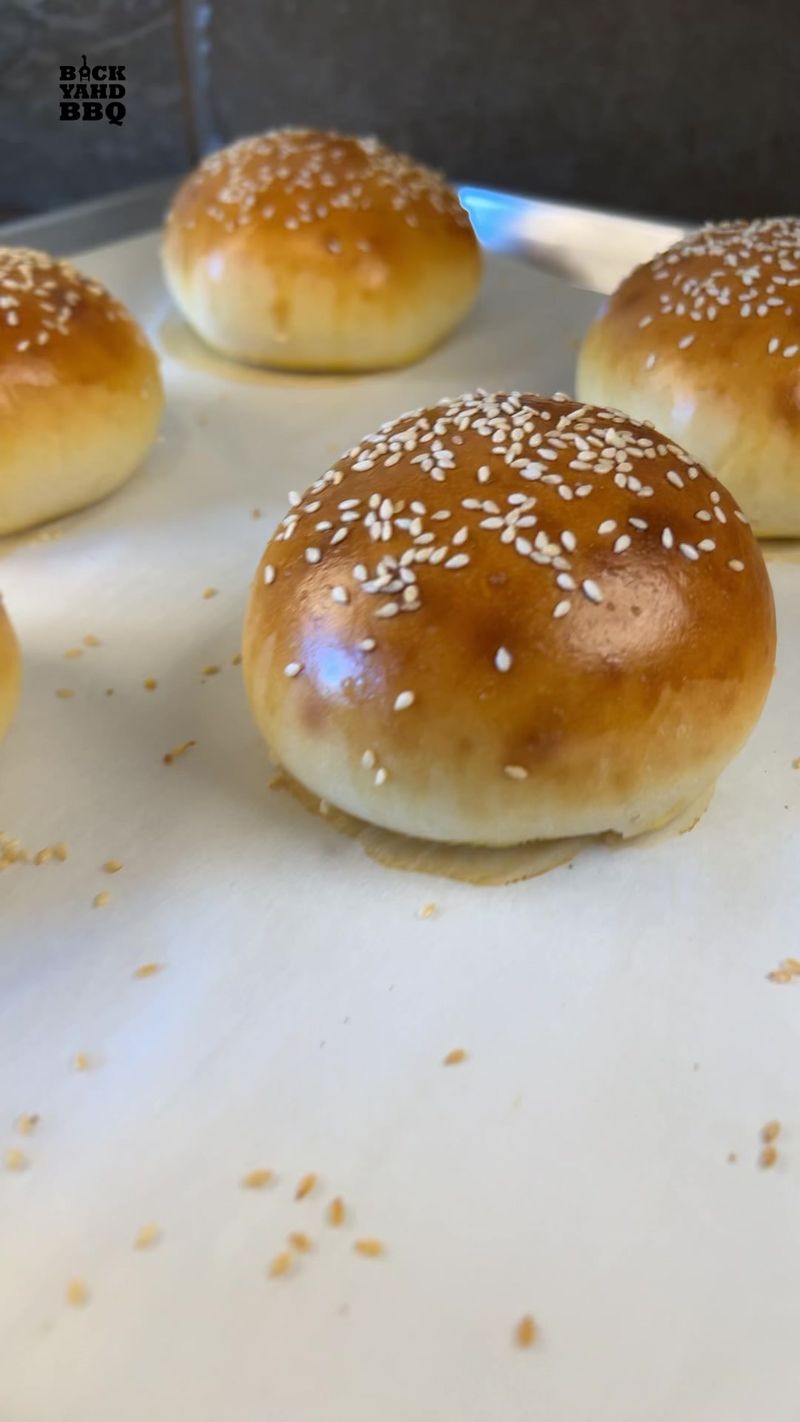
Rich, buttery brioche burger buns that make 8 buns in about 2.5 hours. Luxuriously soft with a golden crust - perfect for gourmet burgers.
Recipe Overview
Ingredients
- • 420 g Bread Flour (3-1/2 cups)
- • 7 g Instant Yeast (1 packet (2-1/4 tsp))
- • 5 g Salt (1 tsp if unsalted butter, 1/2 tsp if salted butter)
- • 1 Egg
- • 180 ml Milk (3/4 cup, lukewarm, 105°F)
- • 21 g Honey (1 tbsp (or 1 tbsp sugar))
- • 28 g Butter (2 tbsp, softened (not melted))
- • 1 egg Egg Wash (beaten, bubbles removed)
- • Sesame Seeds (optional)
Watch the Recipe
Related Posts

Easy Brioche Burger Buns Recipe Ingredients: 400g (3 cups) flour. 42g (2 tablespoons) honey or 21g (1 tablespoon) sugar. 7g (2 teaspoons or one packet) instant dry yeast. 5g (1 teaspoon) salt or 2
📹 Recipe Video
instagram • 1:00

Ingredients
Recipe yield: 8-10 buns
- 420 g (14.8 oz) Bread Flour(3-1/2 cups)
- 7 g (0.2 oz) Instant Yeast(1 packet (2-1/4 tsp))
- 5 g (0.2 oz) Salt(1 tsp if unsalted butter, 1/2 tsp if salted butter)
- 1 Egg
- 180 ml (12 tbsp) Milk(3/4 cup, lukewarm, 105°F)
- 21 g (0.7 oz) Honey(1 tbsp (or 1 tbsp sugar))
- 28 g (1 oz) Butter(2 tbsp, softened (not melted))
- 1 egg Egg Wash(beaten, bubbles removed)
- Sesame Seeds(optional)
Equipment Needed
- •Stand mixer with dough hook (or mix by hand)
- •Mixing bowl
- •Flat beater attachment (for initial mixing)
- •Oiled container for proofing
- •Baking sheet
- •Parchment paper
- •Pastry brush (for egg wash)
- •Paper towel (for removing egg bubbles)
🔧 Equipment Needed:
- • Stand mixer with dough hook (or mix by hand)
- • Mixing bowl
- • Flat beater attachment (for initial mixing)
- • Oiled container for proofing
- • Baking sheet
- • Parchment paper
- • Pastry brush (for egg wash)
- • Paper towel (for removing egg bubbles)
Instructions
20 stepsMix Dry Ingredients
Add flour, yeast, and salt to a bowl and mix to combine.
Tips
- •Mixing dry ingredients first ensures even distribution
- •Use 1 tsp salt if using unsalted butter, or 1/2 tsp if using salted butter
Add Wet Ingredients
Add egg, lukewarm milk (105°F/40°C), and honey to the dry ingredients.
Tips
- •Milk should be warm but not hot
- •Can substitute honey with sugar (use 21g/1 tbsp)
Initial Mix
Mix by hand or with mixer on low using flat beater attachment until it forms a shaggy dough, about 30 seconds.
Tips
- •Don't overmix at this stage
- •Dough will look rough - that's perfect
Scrape Bowl
Scrape the edges of the bowl to incorporate any dry flour.
Tip
- •Make sure all flour is incorporated
Knead Dough
Switch to dough hook and knead on medium speed for 4 minutes (or by hand for 9 minutes) until smooth and elastic.
Tips
- •Dough should become smooth and pull away from bowl sides
- •If kneading by hand, use push-fold-turn technique
Add Butter & Finish Kneading
Add softened butter and knead for another 1 minute until fully incorporated.
Tips
- •Butter should be soft, not melted
- •Dough will become silky and slightly sticky
First Rise
Shape dough into a ball. Place in an oiled container and let double in size at 80°F for about 1 hour.
Tips
- •Cover container to prevent drying
- •Warm oven (turned off, light on) works great
- •Dough should double in volume
Degas Dough
Punch out the air so the buns don't have big air bubbles.
Tips
- •Press firmly to release trapped air
- •This creates even crumb structure
Pre-Shape
Place on floured surface and fold the sides up and over itself to shape into a ball.
Tips
- •Use just enough flour to prevent sticking
- •Folding builds structure
Divide Dough
Divide the dough into 8-10 balls of 80g each.
Tips
- •Use a scale for uniform buns
- •80g makes perfect slider/burger bun size
Shape Balls
Pinch and tuck each ball until smooth.
Tips
- •Tuck seam side down
- •Create tension on surface for smooth tops
Final Shape
Final shape each ball by placing it on the counter, put your claw hand over it, and rotate counter-clockwise a few times.
Tips
- •The claw technique creates perfect round buns
- •Surface should be very smooth
Prepare for Proofing
Place all buns on a parchment paper-lined baking sheet.
Tips
- •Leave 2-3 inches between buns
- •They will expand during proofing
Flatten
Flatten them down thin so they bake as a bun, not a ball.
Tips
- •Press firmly but gently
- •About 1/2 to 3/4 inch thick
Second Rise
Cover and let rise for 1 hour at 80°F until puffy and nearly doubled.
Tips
- •Cover with damp towel or plastic wrap
- •Buns should jiggle slightly when sheet is moved
Prepare Egg Wash
Remove all bubbles from the beaten egg using a paper towel.
Tips
- •Bubbles create uneven finish
- •Dab paper towel on surface to pop bubbles
Egg Wash & Seeds
Brush the buns with beaten egg and sprinkle sesame seeds on top.
Tips
- •Brush gently to avoid deflating
- •Sesame seeds are optional but traditional
Bake
Bake at 375°F (190°C) for 12-15 minutes until golden brown.
Tips
- •Rotate pan halfway for even browning
- •Buns should be deep golden color
- •Internal temperature should reach 190°F
Cool
Let cool on a wire rack.
Tips
- •Cooling on rack prevents soggy bottoms
- •Let cool at least 10 minutes before slicing
Slice & Serve
Use a bread knife to slice them down the middle. Butter and toast them, add your patties and toppings, and you're good to go.
Tips
- •Serrated knife works best
- •Toasting enhances flavor and adds crunch
- •These buns are rich and hold up to juicy burgers
You've completed all 20 steps. Time to eat.
Important Notes
These brioche buns are richer and more luxurious than standard burger buns due to the butter and egg content. The double rise creates the characteristic soft, fluffy texture of brioche. Perfect for gourmet burgers, sliders, or any sandwich that deserves special treatment. Store in airtight container for up to 3 days, or freeze for up to 1 month.
⚠️ Important Notes:
These brioche buns are richer and more luxurious than standard burger buns due to the butter and egg content. The double rise creates the characteristic soft, fluffy texture of brioche. Perfect for gourmet burgers, sliders, or any sandwich that deserves special treatment. Store in airtight container for up to 3 days, or freeze for up to 1 month.
Pro Tips
- •Don't rush the rises - they're critical for brioche texture
- •Cold butter is easier to incorporate than melted
- •Flat beater first, then dough hook prevents flour explosion
- •These freeze beautifully - wrap individually
💡 Pro Tips:
- • Don't rush the rises - they're critical for brioche texture
- • Cold butter is easier to incorporate than melted
- • Flat beater first, then dough hook prevents flour explosion
- • These freeze beautifully - wrap individually
Scan for Recipe
bkyhd.com/brioche-burger-buns
Support Us on Patreon
bkyhd.com/patreon
Gear for This Recipe
Check out the gear we use and recommend for this recipe.